How to Make the Sky Blue in Photoshop (CS5)
So, I know there’s probably multiple ways to do this, and the one I’m about to show you probably isn’t technically right. {Also, I don’t have one of those easy YouTube videos to watch as I click on each thing step-by-step, so screen shots will have to do} :0P
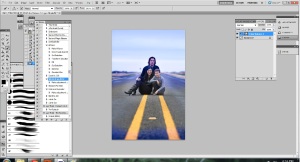
This is a picture of me and my family…
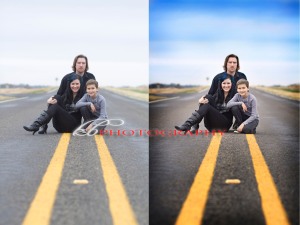
A lovely friend of mine too this picture for me with my camera. She did an excellent job! Such a great picture SOOC. I just love a little POP of color though~~ Had to whip it up!
It was VERY overcast today, it actually works out great for this kind of enhancement. I didn’t actually follow all the steps I’m about to show you to get the sky this color. After the “multiply” step, I just used a FRESH Action by Paint the Moon called Mr. Blue Skies and then added the burnt edges with an MCP action called MCP Burnt Edges I. BUT since not everyone has actions, I thought I’d show a way you can achieve this manually. (click on the photos to enlarge)
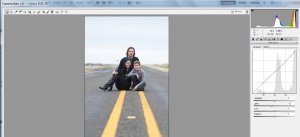
Step 1: I open my images in Camera Raw. I went ahead and darkened the “Lights” just a bit.
Step 2: Right-click on the “Background” layer and “duplicated layer”.
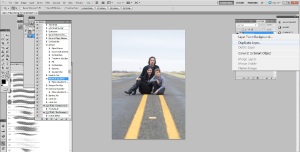
Step 3: Change layer to “multiply”.

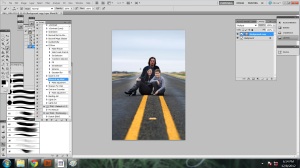
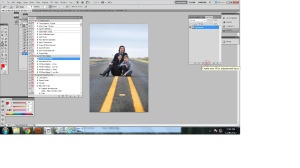
Step 4: Add a “vector mask”.
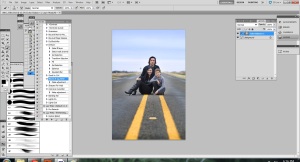
This is so you can get a black paint brush and paint over the areas you do NOT want “multiplied”.
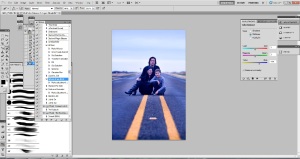
Step 5: Paint areas you do not want affected by layer.
What I did in this photo was paint with the brush at 100% opacity on us and then changed to about 50% as I painted the rest of the road. The reason I use a vector mask instead of just erasing the multipy layer is so that if I accidentally go over something that I want to stay multiplied, I can go back over it with a white brush to change it back; I feel like I have a little more control than when using the eraser tool.
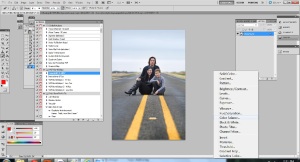
Step 6: Right-click bottom layer and “merge visable”.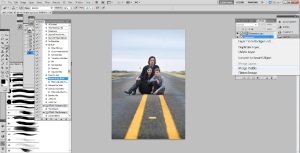 Step 7: Creat a new adjustment layer and select “Color Balance”.
For this one I just kinda played around with all three, Shadows, Midtones, and Highlights and just moved the bar over to blue a little less than half way on each one {You might want to play with the green, etc too! I used another action over the whole photo which is why the blue in my final photo is not the same as shown here}.
Step 8: Paint with a black brush, over the areas you want to remove the blue hue from.
Then, merge layers like I did before.
You can also use the burn tool to intensify the blue and manually add the burnt edges effect.![]()
<br>
{This won’t work on all washed out skies… sometimes it seems like the blue hue just wont add much blue; there has to be a little blue to work with to begin with it seems, but like in this picture, it looked completely white before I did the multiply layer }